What Makes a Podcast Look and Sound Professional?
Most people assume a podcast sounds “unprofessional” because of a cheap microphone. That’s only part of the story. The bigger culprit, more often than not, is the room itself. Two podcasters can use the exact same $100 microphone and get completely different results, simply because one is recording in a bedroom with a mattress and curtains, and the other is recording in a bare tiled living room with a glass table in the middle.
If you’re researching how to start a podcast, or you’ve already recorded a few episodes and they don’t sound quite right, this guide walks through the actual decisions that shape audio and video quality: the room, the microphone, the lighting, the camera framing, and the small habits that keep every episode consistent. Some of this you can do at home. Some of it is genuinely easier in a proper podcast studio in Bangalore that’s already treated for sound. Either way, understanding the “why” behind each choice will help you get better results, wherever you record.
Decide What Type of Podcast You Want to Create
Before buying anything, it helps to know what kind of podcast you’re actually making, because the setup changes quite a bit depending on the format.
A solo podcast, where you’re talking directly into a mic with no guest, needs the least equipment. One microphone, one pair of headphones, and a quiet room get you most of the way there.
A two-person interview show needs a setup that keeps both voices balanced and separate, which usually means two microphones instead of one shared mic, along with a way to record both audio tracks so you can edit them individually later.
A group discussion with three or more people adds complexity fast. You need enough microphones (or one that’s genuinely built for group pickup), enough seating that doesn’t force people to sit too close or too far from the mic, and a room large enough that voices don’t bounce around and blur into each other.
If you’re planning a video podcast for YouTube, add lighting and camera framing to the list from day one. Trying to bolt video onto an audio-only setup later usually means redoing half your equipment.
Knowing your format first means you’re not buying gear you don’t need, or realising three episodes in that you actually needed a second microphone.
Choose the Right Recording Space
This is the step most beginners skip, and it’s the one that affects sound quality the most.
An untreated room, especially one with hard, flat, parallel surfaces like bare walls, tiled floors, and glass windows, creates something called reflection. Sound waves from your voice bounce off these hard surfaces and reach the microphone a fraction of a second after your direct voice does. The mic picks up both the original sound and the reflected version, and the result is a faint echo or a “hollow,” roomy quality that makes speech harder to follow, especially on headphones.
You’ll notice this most in rooms with high ceilings, empty rooms with little furniture, and kitchens or bathrooms with tiled surfaces. A small bedroom with a bed, curtains, a rug, and a wardrobe is almost always a better recording space than a large, empty living room, purely because soft materials absorb sound instead of reflecting it.
If you’re recording at home, look for the smallest room with the most soft furnishings. If that’s not available, a professional podcast recording studio solves this at the source, since the walls and ceiling are already designed to absorb reflections rather than bounce them around.
Why Audio Quality Matters More Than Expensive Cameras
Here’s something beginners get backwards fairly often: they’ll spend on a good camera and skip the microphone, when it should really be the other way around.
Viewers tolerate average video quality far more than they tolerate bad audio. A slightly soft picture doesn’t stop someone from watching to the end. Muffled, echoey, or inconsistent audio does. It’s tiring to listen to, and most people will simply close the tab or skip the episode rather than push through it.
This is partly why platforms like YouTube and Spotify see stronger completion rates on episodes with clean audio, even when the visuals are fairly simple. Audio is also unforgiving in a specific way: video issues can sometimes be fixed with editing, but muffled or distorted audio recorded on a bad mic in a bad room is very difficult to fully rescue afterward, no matter how much time you spend on it in post-production.
So if you’re working with a limited budget, put the larger share of it toward the microphone and the room treatment, and treat the camera as the next priority after that, not the first one.
Choosing the Right Podcast Microphone
There are two broad categories of podcast microphones worth knowing about, and picking the right one for your situation matters more than picking the “best” one on paper.
USB microphones plug directly into your laptop and are the simplest way to start. They work well for solo podcasts recorded in a quiet, treated space. The downside is that most USB mics are designed to pick up sound from a fairly wide area, which means they also pick up more room noise and reflections, so they’re less forgiving in an untreated space.
XLR microphones need a separate audio interface or mixer to connect to your computer, which adds a bit of cost and complexity. In exchange, they generally offer more control and are often better suited to multi-person setups, since each mic can be recorded on its own channel and adjusted individually during editing.
Beyond the type, microphone placement changes the result more than most beginners expect. A mic placed 6 to 8 inches from your mouth, angled slightly off-axis rather than pointed straight on, reduces plosives (the harsh “p” and “b” pop sounds) and picks up a fuller, more natural tone. Speaking too far from the mic pulls in more room sound; speaking too close can cause distortion and exaggerate breathing sounds.
If you’re recording a two-person or group podcast, each speaker needs their own microphone rather than sharing one. Shared mics almost always result in uneven volume, where one person sounds clear and the other sounds distant.
Basic Lighting for Video Podcasts
If your podcast includes video, lighting affects how professional it looks almost as much as the camera itself.
The most common beginner mistake is relying on a single overhead light or a window as the only light source. This creates harsh shadows under the eyes and nose, and if you’re near a window, the lighting will look completely different depending on the time of day, which makes episodes recorded at different times look inconsistent.
A simple three-point lighting setup solves most of this: a key light (your main light source, placed slightly to one side of the camera), a fill light (a softer, dimmer light on the opposite side to reduce harsh shadows), and a back light (positioned behind you, aimed at your shoulders and hair, to separate you visually from the background). You don’t need expensive gear for this. Two soft LED panels and a small backlight are enough for most talk-based podcasts.
Consistency matters more than intensity. If every episode uses the same lighting position and brightness, your podcast will look like a cohesive series rather than a set of unrelated recordings.
Camera Setup for a Professional Podcast
For video podcasts, camera choice matters less than most beginners think, and framing matters more.
A recent smartphone with a decent rear camera, mounted on a stable tripod, produces perfectly usable footage for a podcast. What actually makes footage look “professional” is consistent, well-thought-out framing: eyes roughly in the upper third of the frame, enough headroom without excessive empty space above the head, and a stable shot with no handheld shake.
For a solo podcast, one camera is enough. For a two-person interview, most creators use two cameras, one on each speaker, so the video can cut between angles during editing, which keeps the visual pacing more engaging than a static two-shot for the entire episode. A wider third camera covering both speakers is a nice addition once you’re past the basics, but it’s not essential when you’re starting out.
Keep the camera at eye level rather than looking up or down at your subject. A camera angled from below tends to look unflattering and slightly unnatural, while a camera positioned too high can make the speaker look small in the frame.
Seating, Background and Studio Arrangement
Seating and background don’t affect audio directly, but they shape how comfortable the conversation feels, which comes through in how natural people sound.
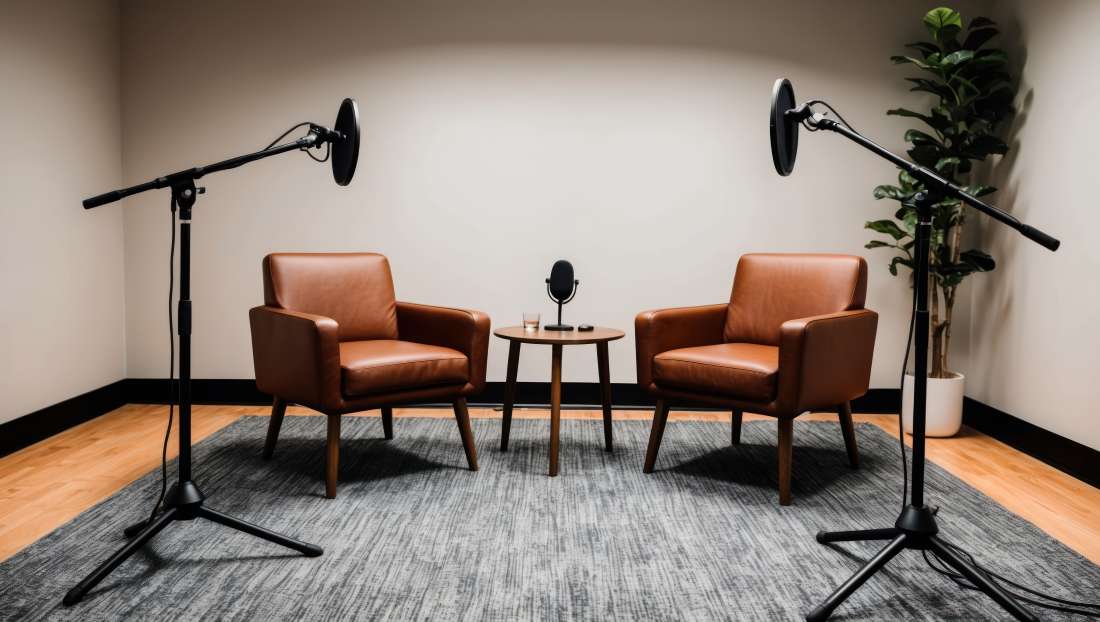
Chairs that are too far apart make interviews feel stiff and formal. Chairs that are too close can feel invasive, especially for guests who don’t know you well. A distance where two people can speak comfortably without leaning in or raising their voice usually works best, and it also keeps both speakers at a consistent distance from their microphones.
For backgrounds, simpler is usually better. A cluttered background pulls attention away from the conversation, while a plain wall, a branded backdrop, or a softly lit bookshelf-style setup keeps the focus on the speakers. If you’re building a background from scratch at home, avoid anything with strong patterns, since these can create a distracting visual effect on camera, especially at certain angles.
This is also where a studio setup, like the plug-and-play podcast studio, has a practical advantage: the seating distance, background, and lighting positions are already worked out, so you’re not testing and adjusting all of this yourself before every session.
How to Control Echo and Background Noise
Echo and background noise are two different problems, and they need different fixes.
Echo comes from sound reflecting off hard surfaces, as covered earlier. The fix is absorption: soft furnishings, curtains, rugs, foam panels, or a fully sound-treated room if you have access to one. You can reduce echo noticeably at home just by recording in a smaller, more furnished room and closing curtains or blinds during the session.
Background noise is different. This includes traffic sounds, fans, air conditioners, refrigerators, and other people in the building. Some of this you can control (turning off a noisy fan during recording, choosing a room away from the street), and some of it you can’t, particularly if you’re in a busy apartment or a shared office space in a city like Bangalore, where traffic and construction noise are fairly constant realities.
This is one of the more practical reasons creators eventually move to a professional podcast recording studio: a sound-treated room removes both problems at once, rather than requiring you to manage room reflections and outside noise separately every time you record.
What Equipment Do You Actually Need?
For a basic solo audio podcast, you realistically need: one decent USB or XLR microphone, a pair of closed-back headphones for monitoring, a pop filter or windscreen, a stable mic stand or arm, and recording software on your laptop.
For a two-person or group podcast, add: one microphone per speaker, an audio interface or mixer if you’re using XLR mics, and a way to record each speaker on a separate track for easier editing.
For a video podcast, add: a camera (a smartphone is fine to begin with), a tripod, two basic LED lights at minimum, and a simple background setup.
None of this needs to be top-of-the-line when you’re starting out. The room and the microphone placement will affect your final sound far more than whether you bought the mid-range or the top-tier version of a microphone.
Podcast Recording at Home vs. a Professional Studio
Recording at home has real advantages when you’re just starting out. It’s free, it’s convenient, and it lets you experiment without any pressure. If you’re recording alone and you have access to a small, furnished room, home recording can genuinely produce good results.
The limitations tend to show up as your podcast grows. Consistent lighting across episodes is harder to maintain at home, since natural light changes through the day and most home lighting setups aren’t built for video. Room acoustics are only ever “good enough,” not fully controlled, so echo and outside noise are always a background risk. And if you’re recording interviews, coordinating a guest’s visit to your home, along with all the setup and testing beforehand, adds friction that a dedicated space avoids.
A professional podcast studio in Bangalore removes most of these variables at once. The room is already sound-treated, the lighting is already positioned and consistent, the seating and background are already arranged, and the equipment is already tested and working before you arrive. For business owners recording interview series, or creators who record regularly and need every episode to sound and look the same, this consistency saves a genuine amount of time compared to rebuilding the setup at home each time.
There isn’t a universally “right” answer here. A solo creator recording occasionally may do perfectly well at home. A creator recording weekly video interviews with guests will usually find that a studio setup pays for itself in saved time and consistent quality.
How to Prepare Before Your Recording Session
A few simple habits before you hit record prevent most of the common problems.
Do a short test recording, even 30 seconds, and actually listen back with headphones before starting the real session. This catches issues like a loose mic cable, an unusually loud fan, or a mic placed too far away, while there’s still time to fix it.
Keep a glass of water nearby. Dry mouth sounds are more noticeable on a good microphone than people expect, and they’re distracting on playback.
Silence phone notifications and let people around you know you’re recording, so you’re not interrupted mid-conversation.
If you’re recording with a guest, send them a short note beforehand about what to wear (solid colours generally work better on camera than busy patterns) and roughly how long the session will take, so they’re not caught off guard.
Common Podcast Recording Mistakes Beginners Make
A few mistakes come up often enough that they’re worth calling out directly.
Placing the microphone too far from the mouth, often because it looks better in frame, at the cost of picking up more room noise and less direct voice.
Recording in a different room, or with different lighting, every episode, which makes a show feel inconsistent even if each individual episode sounds fine on its own.
Skipping the test recording, and only discovering an issue, like a muted channel or a rattling desk, after a 40-minute conversation is already over.
Using a shared microphone for two speakers instead of one mic each, which almost always results in one person sounding noticeably quieter or more distant than the other.
Ignoring background noise sources that seem minor in person, like a ceiling fan or a refrigerator, but become surprisingly loud and distracting once picked up by a sensitive microphone.
How to Make Your Podcast Look Consistent Across Episodes
Consistency is what makes a podcast feel like a proper show rather than a series of one-off recordings, and it’s often the difference between something that looks amateur and something that looks established, even when the individual production quality is similar.
Use the same microphone position, the same lighting setup, and the same camera framing every time you record. If you’re recording at home, it helps to actually mark where your chair, lights, and camera go, so you can rebuild the same setup quickly each session rather than eyeballing it.
If you record in a studio, this becomes far simpler, since the physical space, lighting, and camera positions stay the same by default from one session to the next.
Final Checklist Before You Press Record
Before starting your recording, run through this quickly: the room is quiet, with fans and notifications off. The microphone is positioned correctly for each speaker and a test recording has been checked with headphones. Lighting is set up and matches previous episodes if this is an ongoing series. The camera is framed correctly, at eye level, with adequate headroom. Water is within reach, and any guest has been briefed on what to expect.
FAQs
At minimum, a decent microphone, headphones for monitoring, a quiet room, and recording software. For video podcasts, add a camera, tripod, and basic lighting. You can start with fairly modest gear as long as the room and microphone placement are handled well.
Not strictly. A good USB microphone in a quiet, well-furnished room can sound clean and professional. What matters more than the specific microphone is room acoustics and correct mic placement.
Yes. Most professional podcast studios, including ShootOnRent’s setup in Bangalore, are equipped for both audio-only and video podcast recording, with lighting and camera positioning already worked out.
Record in a smaller room with soft furnishings like curtains, rugs, and upholstered furniture, since these absorb sound instead of reflecting it. Avoid large, empty rooms with hard, flat surfaces.
Both work, depending on your situation. Home recording suits occasional solo podcasts in a well-furnished room. A studio makes more sense for regular interview-style podcasts, video podcasts, or anyone who wants consistent quality without managing acoustics and lighting themselves each time.
Sajil is a content and creative industry professional with expertise in video production, photography, podcasting, and content creation. With practical knowledge of studio production and creative workflows, Sajil shares useful insights to help creators and businesses make informed decisions.